
Why Your Thermal Printer Won’t Calibrate: Media Sensors Explained
Why calibration fails
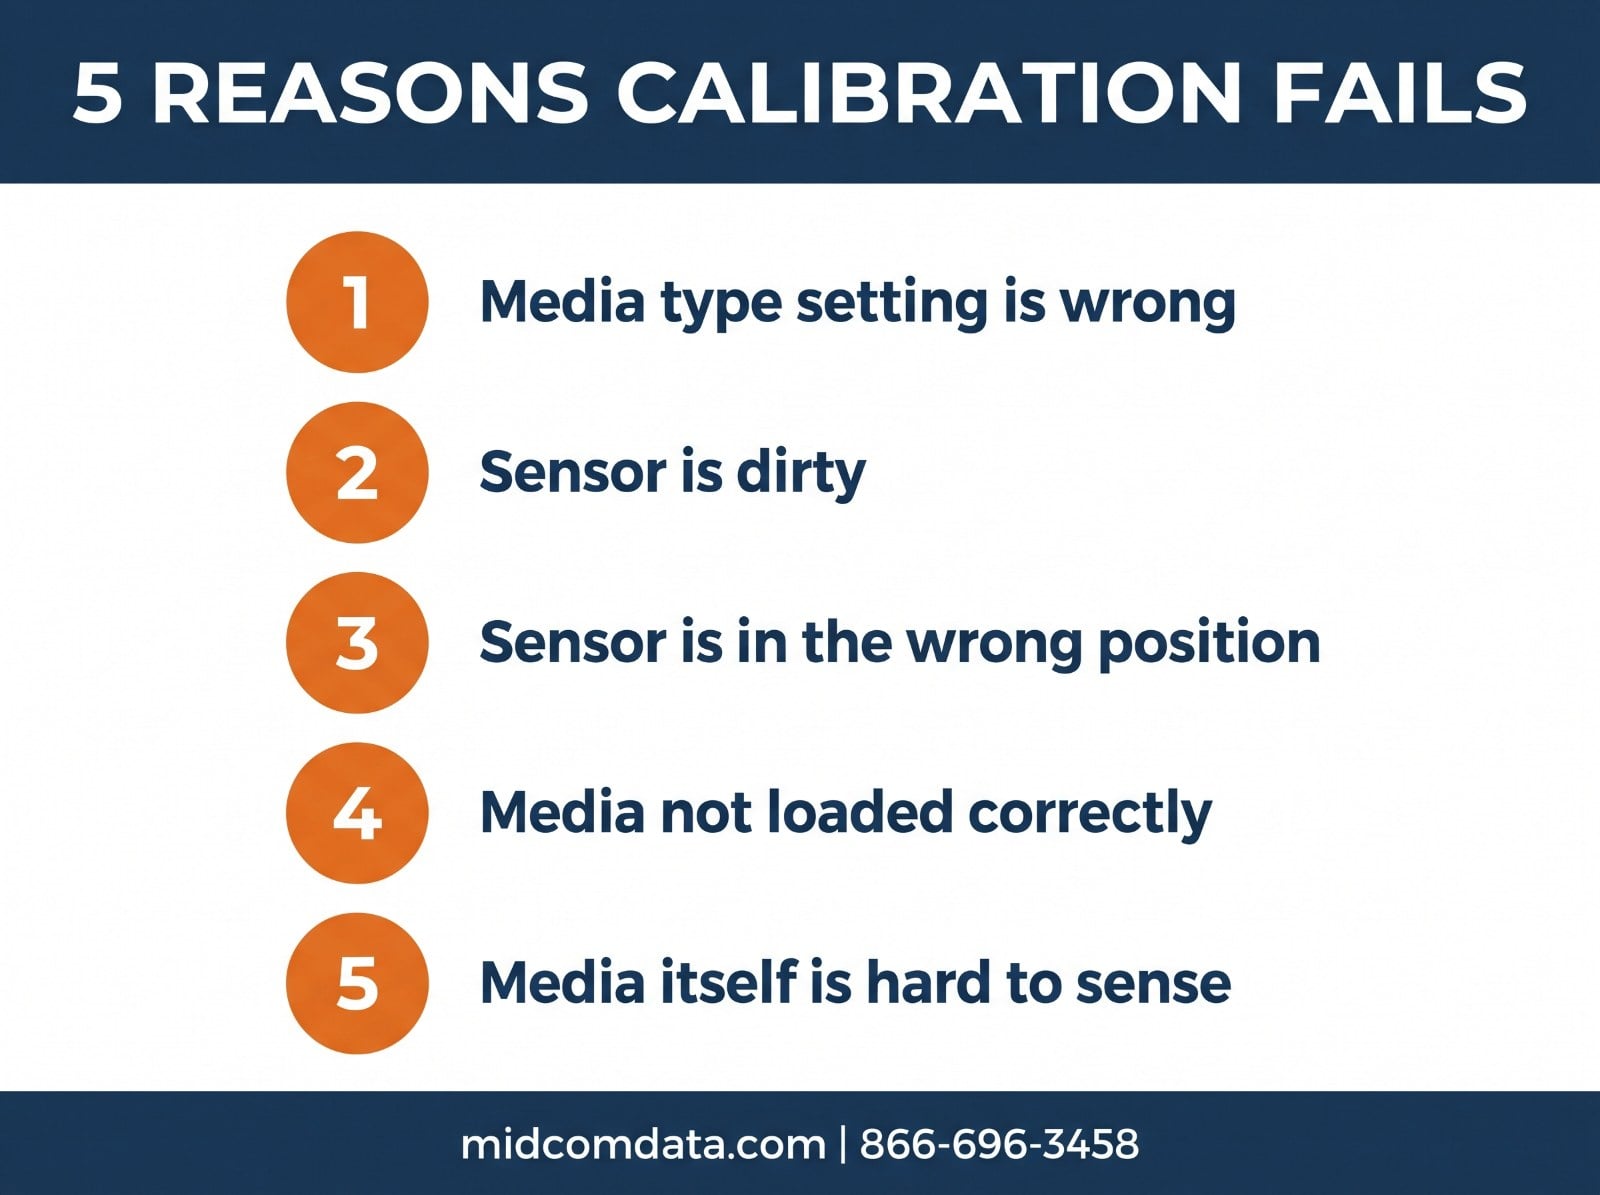
When a thermal printer won’t calibrate, the cause is almost always one of three things: the media-type setting doesn’t match the labels loaded, the sensor is dirty or positioned wrong, or the media has no edge for the sensor to find. The printer isn’t broken. It’s being asked to detect something that isn’t there, or to detect it with a sensor that can’t see. Knowing which sensor your printer is using and what it’s looking for solves most calibration problems in under five minutes.
What calibration actually does
Calibration teaches the printer where one label ends and the next begins. The printer feeds media past a sensor, records how the sensor reading changes as labels and gaps (or marks) pass by, and sets thresholds so it can find the top of each label during normal printing.
If the printer can’t find a repeating pattern in what the sensor sees, calibration fails. The symptoms are familiar: labels feed continuously without stopping, print lands partly on one label and partly on the next, the printer throws a media-out error with a full roll loaded, or it feeds three blank labels and then prints.
The two sensor types and what they detect
Transmissive sensor — reads gaps
A transmissive sensor has a light emitter on one side of the media path and a receiver on the other. Light shines through the media. Where there’s a label on the liner, less light gets through. Where there’s only liner (the gap between labels), more light passes. The printer reads that change in light as the label edge.
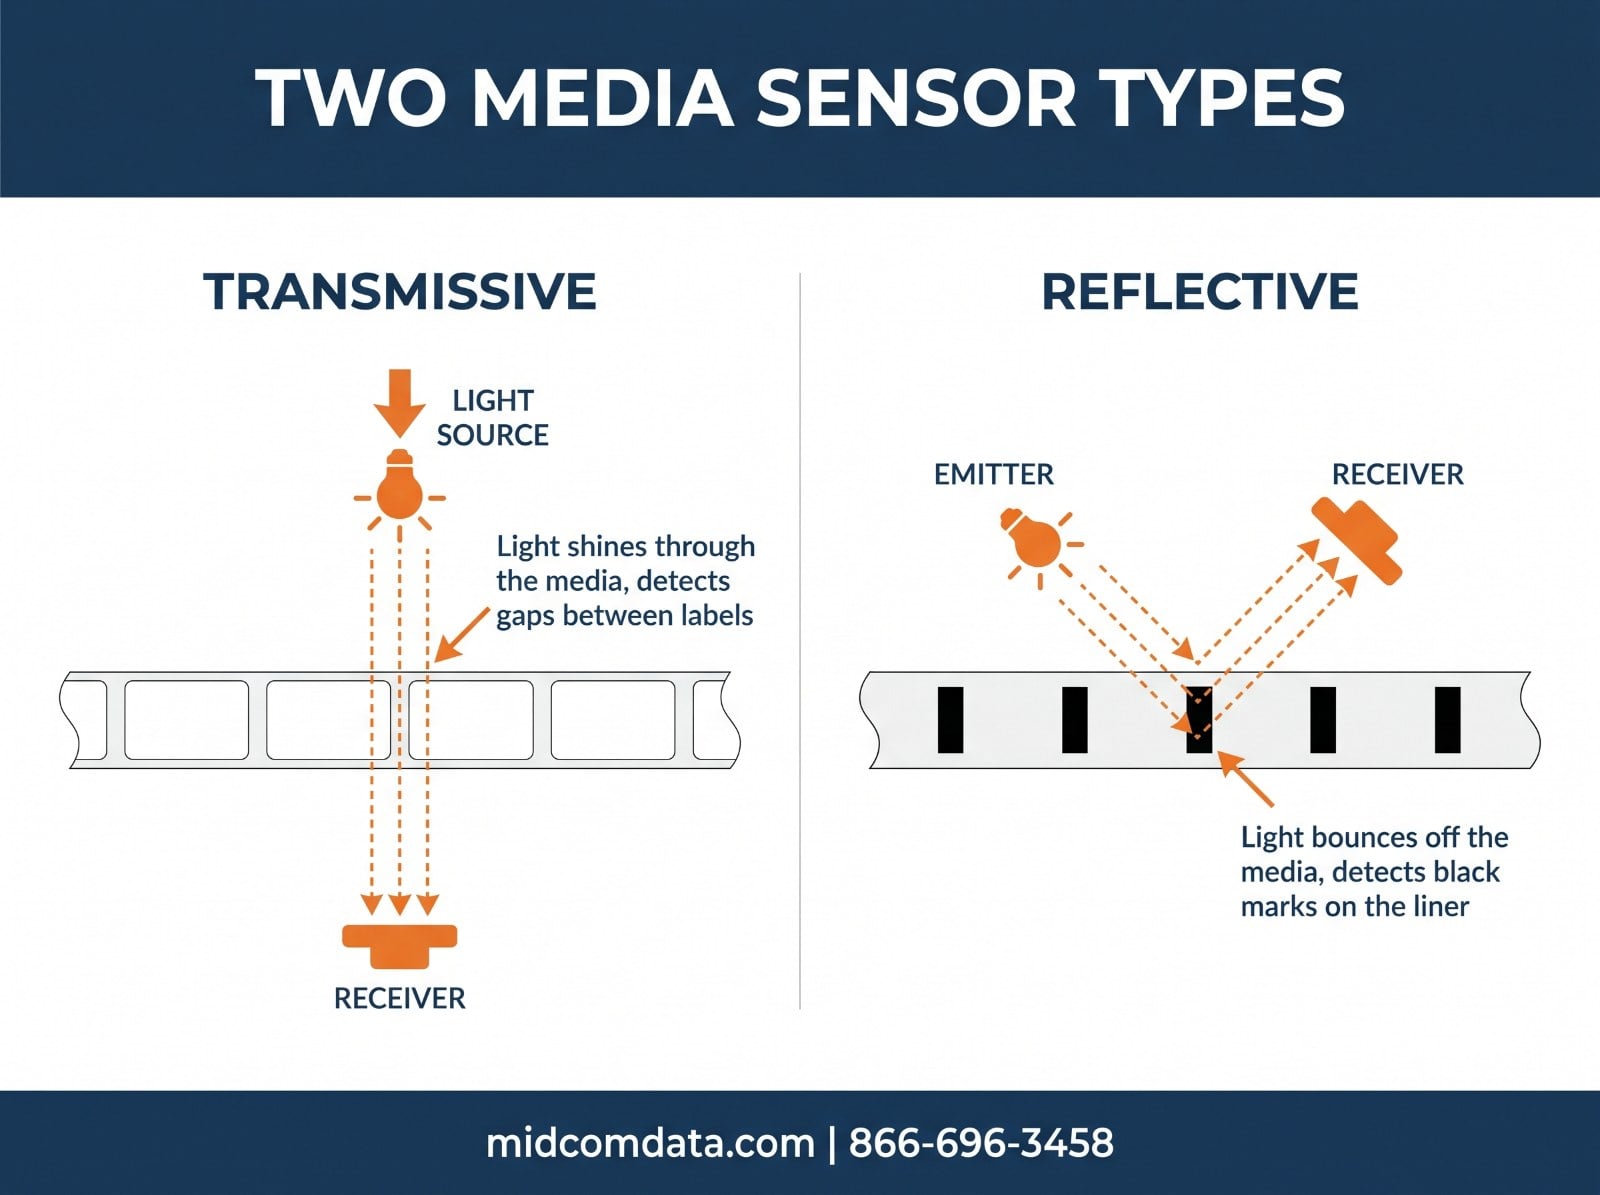
This is the default for most die-cut labels on a roll. It works because the gap between labels is more transparent than label-plus-liner.
It fails when the gap isn’t more transparent — for instance, with very thin or translucent labels where the difference between label and gap is too small to detect reliably, or with a liner so opaque that almost no light gets through either way.
Reflective sensor — reads black marks
A reflective sensor has the emitter and receiver on the same side. Light bounces off the media and back. A black mark printed on the back of the liner absorbs the light instead of reflecting it, and the printer reads that drop as the label position.
This is used for media that has no gaps — continuous stock with black marks, tag stock, or labels where the gap can’t be sensed transmissively. The mark is usually a rectangle on the liner’s back side, positioned where the printer’s reflective sensor sits.
It fails when the mark isn’t under the sensor, when the mark is too small or too light to register, or when the media is set to gap mode so the printer never reads the reflective sensor at all.
Notch and hole sensing
Some media uses a punched notch or hole instead of a printed mark. The sensor reads this the same way as a gap: a sudden change in what’s passing by. The notch needs to sit in the sensor’s path, which on most printers means the sensor has to be positioned at a specific lateral spot — and that spot differs from where it sits for standard gap labels.
The five reasons calibration fails, in order of likelihood
1. Media type setting is wrong
The most common cause by a wide margin. If the printer is set to “gap” and you’ve loaded black-mark media, it’s reading the transmissive sensor while the information it needs is on the reflective one. If it’s set to “mark” and you’ve loaded gap labels, the opposite. If it’s set to either and you’ve loaded continuous media with no gaps or marks, there’s nothing to find and calibration can’t succeed.
Check the media type setting first. On most printers this is in the front panel menu under media or sensor settings. Match it to what’s loaded: gap/web for die-cut labels, mark/black mark for marked media, continuous for stock with neither.
2. Sensor is dirty
Label adhesive, paper dust, and ribbon residue accumulate on the sensor over time and make readings erratic. The printer sees a noisy signal with no clean transitions and gives up. This builds slowly, so a printer that calibrated fine for months and now won’t is often just dirty.
Clean the sensor with a dry swab or a swab lightly dampened with isopropyl alcohol. The sensor is usually a small window or slot in the media path, sometimes behind a cover. Don’t use anything abrasive. Then recalibrate.
3. Sensor is in the wrong position
On many industrial printers the sensor is movable, because different media widths and mark positions require it. If someone moved it for a previous job and it’s now sitting where there’s no gap to see — over the label itself, or off the edge of narrow media — it reads a constant signal and calibration fails.
For gap media, the sensor should sit over the liner where the gap passes. For black-mark media, it needs to sit directly over the mark. Check the position against the media and move it if needed.
4. Media isn’t loaded correctly
Media threaded on the wrong side of a guide, or not under the sensor at all, produces the same symptom as a dirty sensor. So does media that’s too narrow for the sensor’s current position. Reload following the printer’s media path diagram — most have one printed inside the cover — and confirm the media passes through the sensor area.
5. The media itself is the problem
Some media is hard to sense. Very thin labels with little opacity difference from the liner. Clear or translucent labels. Labels with a dark liner. Black-mark media where the marks are faint or inconsistent. In these cases, the printer may need manual sensor adjustment — setting thresholds by hand rather than letting auto-calibrate guess — or a different media spec.
If you’ve checked the first four causes and a different roll of the same media also won’t calibrate, suspect the media. MIDCOM stocks labels and media matched to specific printer models and can help identify whether a particular stock is a known calibration problem.
What to check before calling for service
Most calibration calls don’t need a technician. Work through this before you pick up the phone.
Confirm the media type setting matches the loaded media. Open the printer and look at the sensor — if it’s visibly dirty, clean it. Check the sensor position against where the gap or mark actually passes. Reload the media following the path diagram. Try a fresh roll from a different box to rule out a bad batch. Run calibration again after each change, not after all of them, so you know which one fixed it.
If it still won’t calibrate after all of that, the sensor itself may have failed — they’re electronic components and they do wear out, especially on printers with high duty cycles. That’s a service call. MIDCOM Data Technologies provides on-site printer repair across the U.S. and Canada, and our technicians carry common sensor assemblies for Zebra, Honeywell, and SATO printers. Call 866-696-3458 or request service.
Preventing it
Calibration failures are mostly a maintenance and process problem, so they respond to maintenance and process.
Clean the sensor on the same schedule as the printhead. Both collect the same debris, and a swab takes ten seconds. Our preventive maintenance schedule includes sensor cleaning as a standard step.
Recalibrate on every media change, not just when something goes wrong. Different rolls — even nominally identical ones from different lots — can have slightly different opacity, and a two-second calibration on load prevents a ten-minute troubleshooting session later.
Document the sensor position and media type setting for each media you run. When someone swaps media for a different job and swaps back, they know where things need to be. On fleets of printers, consider fleet management software that can push media settings to a printer so they don’t depend on someone remembering.
Standardize media where you can. Fewer media types means fewer sensor positions and settings to track, and fewer chances for a mismatch.
MIDCOM Data Technologies has supported thermal printers since 1982, with over 3,000 technicians across the U.S. and Canada. Get in touch or call 866-696-3458 if your printers are giving you calibration trouble you can’t trace.
Frequently asked questions
Why does my thermal printer keep feeding blank labels?
The printer can’t find the label edge, so it keeps feeding looking for one. Usually the media type setting doesn’t match the loaded media (gap setting with black-mark media, or either setting with continuous media), the sensor is dirty, or the sensor is positioned where no gap or mark passes. Check the media type setting first, then clean and reposition the sensor, then recalibrate.
What is the difference between a gap sensor and a black mark sensor?
A gap (transmissive) sensor shines light through the media and detects the more transparent gap between die-cut labels. A black mark (reflective) sensor bounces light off the media and detects a dark mark printed on the liner’s back that absorbs light. They are different hardware reading different features, so the printer’s media type setting determines which one it uses.
How do I clean a thermal printer media sensor?
Locate the sensor in the media path — usually a small window or slot, sometimes under a cover — and wipe it with a dry cotton swab or one lightly dampened with isopropyl alcohol. Don’t use abrasives. Clean it on the same schedule as the printhead, since both collect label adhesive and paper dust.
Why won’t my printer calibrate on continuous media?
Continuous media has no gaps or marks for the sensor to detect, so gap or mark calibration has nothing to find. Set the media type to continuous. In that mode the printer uses a fixed label length from the format rather than sensing edges, and calibration isn’t needed in the same way.
When does a calibration problem need a service technician?
After you’ve confirmed the media type setting, cleaned the sensor, checked its position, reloaded the media, and tried a fresh roll — and it still won’t calibrate. At that point the sensor assembly has likely failed. Sensors are electronic components that wear out on high-duty printers and are a standard field replacement.